
User Guide
Download the User Guide to your computer, phone or tablet
- Download for iBooks
- Download in PDF
- Check guide in Spanish by Victor Gonzalo
Overview
Continue reading, if you have these questions:
- What is geotagging good for?
- How Geotag Photos works?
- What to do, before you begin?
- Are my data safe?
What is geotagging good for?
Geotagging is the process of adding a location to your photos. It makes it easy to find exactly where you shot your images and it's also great for organizing your photos. The majority of photo editing apps and services, such as Lightroom, Aperture, iPhoto, Picasa, and Flickr, now support geotagged images. You can also display your trip on a map with a preview of the images, and sort them according to their location, etc.
Photos taken by practically every smartphone are geotagged automatically; but, the majority of compact point-to-shoot, mirrorless, or DSLR cameras don't have a GPS module built-in. When you factor in that dedicated GPS loggers can cost upwards of $200,and that they usually block the hot-shoe so you can't use your flash, they look even less attractive – that's where Geotag Photos Pro comes in.
How it works
Geotag Photos Pro is a complete solution consisting of a smartphone app and a desktop app. The principle behind this is quite simple: you have Geotag Photos Pro on your smartphone, which records your current position while you're taking photos with your camera; and, once finished, the desktop application then writes the recorded location to your images. Alternatively, you can export all of your recorded routes in GPX format and then tag them with any third party geotagging app such as Lightroom's Map module, Aperture's Places feature, etc.
How the magic happens?
Every camera records the picture data each time you take a shot; and, this includes the time each photo was captured. While you are taking your photos, you have the Geotag Photos Pro app running on your phone to record the position of where you are at the time of the photo. The magic comes afterwards, in the merging of that data.
Before you begin
When working with multiple devices in this fashion, the most important factor is to ensure that the time and date in your phone matches that in the camera (they are synchronized). The "Setup camera time" section in Settings on the Geotag Photos Pro mobile app assists you in this; and, it doesn't even matter if the camera has a different time format, as long as they are synced.
Privacy
We take your privacy very seriously, we don't collect any personal data, and all communication with geotagphotos.net is secure. Your password is stored in encrypted form. In addition, you can completely remove your account in user settings at any time.
Geotagging with Geotag Photos Pro Desktop App
Continue reading, if you have these questions:
- How to geotag photos with Geotag Photos desktop app
- How to create your geotagphotos.net account
- What to do, before you start taking pictures
- What to do, when you're done shooting
- How to use Geotag Photos without internet connection
Geotagging with desktop app in short
At the Start of Your Photo Trip- Sync the camera time with the time in your phone.
- Launch the Geotag Photos Pro app on your phone and leave it running silently in the background.
- Start shooting awesome pictures.
- On Geotag Photos app you can upload your recorded trip
- On your Mac or PC, open the desktop app.
- Load your photos, geotag them all with just one click and then import them into your favourite photo editor.
How to create new Geotag Photos account
The account can be created from the Geotag Photos Pro app on iPhone or Android device It enables you to store your trips on the server and use our online desktop geotagging app.
Using Geotag Photos account will also allow you to transfer licenses between your iPhone and Android.
You are asked to create user account when you finish first trip or you can do it manually.
We choose this approach because we don’t want to bother you with registration right after you install the app. This way you can try all the features before registering.
Creating Geotag Photos account on website
- You can create the account in the mobile app only.
Creating Geotag Photos account on iPhone
- Go to Settings > Cloud services
- Choose Link with new service
- Select GeotagPhotos.net
- Select Create new account
- Insert your email and password and tap on Sign up
- That’s it. Your account is created and your phone is linked to this account immediatly
Creating Geotag Photos account on Android
- Open drawer from the left side
- Tap on the gear next to Services and accounts
- Select Add account > GeotagPhotos.net
- Select Create account
- Insert your email and password and tap on Sign up
- That’s it. Your account is created and your phone is linked to this account immediatly
It is not obligatory to use Geotag Photos Pro with its account, but it is much easier to get your trips to our desktop geotagging app. We chose this approach because we don’t want to bother you with registration right after you install the app. This way you can try all the features before registering.
While taking pictures
Before you start taking pictures, you need to sync the time of your camera with that of your phone (you will see the time that should be synced on main screen of Geotag Photos).
- Open the Geotag Photos Pro app on your phone and create a new trip by clicking on + button in top right corner.
- Set the Logging Interval according to your needs: this enables you to fine-tune the balance between your battery life and tagging accuracy. Usually a logging interval of about 2 minutes will ensure your battery lasts the entire day (depending on the condition of the battery in your phone).
- Press the record button and start taking pictures. The app runs minimized in the background and then records your movements.
Note: The Geotag Photos Pro app has to be running and recording while taking pictures to be able geotag your images later.
When you're done shooting
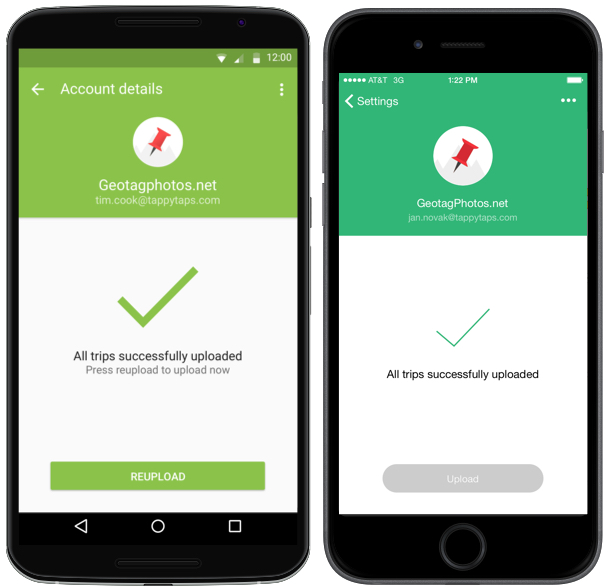
When you’ve finished shooting pictures, you can upload the recorded data from your mobile app to the GeotagPhotos.net service or any other Cloud services:
Cloud services supported by Geotag Photos
Geotag Photos now supports these cloud services: Dropbox, Google Drive and iCloud (available on iOS devices only).
Cloud services supported by Geotag Photos
- Download and install the desktop application (it works on Windows, OS X and Linux).
- Login with your Geotag Photos Pro username and password.
- Open the folder containing your images – either on a memory card from your camera or from any folder in your computer.
Note: It’s always better to geotag your images BEFORE you import them into your photo editor, because if the meta tags of the pictures in the libraries are not refreshed, this can lead to situations where geotags are not visible after import.
When you click on the “Start geotagging” button, the desktop Geotag Photos Pro app automatically sorts out which photos belong to which trips and then writes the latitude, longitude and altitude information to your photos.
No Internet, No problem!
Internet, No problem! Geotag Photos Pro can even be used when there's no Internet connection. The offline desktop app allows you to manually load the GPX file, which contains the data from your trip, and then geotag your images (click here to learn how to get the GPX file).
Geotagging with Lightroom or other 3rd party applications
Continue reading, if you have these questions:
- Do I have to use your desktop app?
- How can I get the GPX file?
- How to use Geotag Photos with Dropbox?
- How can I geotag my photos with Lightroom and other 3rd party apps?
It isn't compulsory for you to use our desktop app for geotagging as Geotag Photos Pro is designed to fit into everyone's workflow. You can export your trips from the mobile app as a GPX file instead, and then use any 3rd party solution such as Lightroom's Map module, Aperture's Places feature, etc.
Geotagging with 3rd party apps in short
At the Start of Your Photo Trip- Sync the camera time with the time in your phone.
- Launch the Geotag Photos Pro app on your phone and leave it running silently in the background.
- Start shooting awesome pictures.
- Export your trips as GPX via Dropbox, web or email
- Open Lightroom.
- Import the GPX files into the Map Module.
- Select your photos and geotag them all with just one click
How to get the GPX file:
There are a number of ways to access the GPX file of your trip:
1. Use linked Cloud services
If you use any of supported Cloud services, all you need to do is to link Geotag Photos Pro with your cloud account; this can be done in Settings.
Once Geotag Photos Pro is linked with cloud service, your trips will be automatically uploaded as a GPX file to it.
2. Share trip from phone
Open Geotag Photos Pro on your phone. Go to the "Trips history" section, open context menu of your trip (...) and select "Share trip". You can then export the GPX file of the selected trip to any supported app your phone has installed.
3. Download from geotagphotos.net
Note: Your device need to be linked with your Geotag Photos account, so your trip is synced automatically.
Login to geotagphotos.net using your Geotag Photos account email and password. Go to the "My Trips" section where you will then be able to download each trip as a GPX file.
Geotagging with Lightroom
To import photos into Lightroom’s Map module: click On Map > Load tracklog, and import the GPX file of your trip. Then, select all the photos you want to geotag and click on Map > Tracklog > Autotag selected photos.
Features of Geotag Photos Pro Mobile apps
Continue reading, if you have these questions:
- How the smartphone apps work?
- How it saves my phone's battery?
- What are the features of iPhone app?
- What are the features of Android app?
Overview
Geotag Photos Pro app for iPhone and Android devices records your position while you’re taking pictures with your camera. The app runs in the background so you will not only forget it’s there, but it will also enable you to focus entirely on capturing that perfect shot.
Power saving
GPS’s traditionally cause extreme battery drain. In fact, most apps which use a GPS can completely drain your phone battery in just a few hours; but, this isn’t the case with Geotag Photos Pro as we’ve implemented a number of power saving mechanisms that enable you to use the app for an entire day.
Geotag Photos Pro doesn’t use the GPS module continuously. It needs to be running in the background to work, but it uses the GPS only when the position needs to be recorded. Of course, you can choose the interval of how often the app records your position and in-between these time, it reverts to minimal power. This freedom means you can adjust the logging interval to your exact needs and it allows you to achieve a perfect balance between accuracy (a shorter logging interval) and battery life (a longer logging interval).
When you’re inside a building the GPS signal is usually blocked. Geotag Photos Pro recognizes this and, in such situations, doesn’t constantly try and obtain a fix and hasten your battery drain; instead, it switches into power-saving mode and then starts logging once again when you move outside.
Features
Home Screen
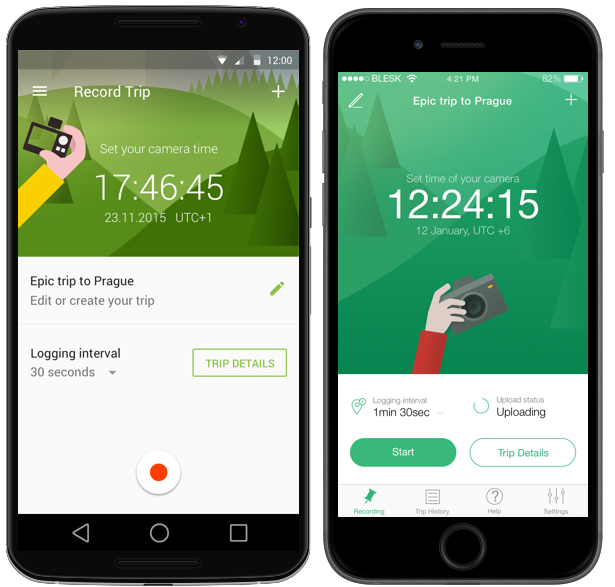
On the Home Screen you can check time to be synced with your camera, create new trip, rename trip, change logging interval, start or stop recording and check trip details.
Recording screen
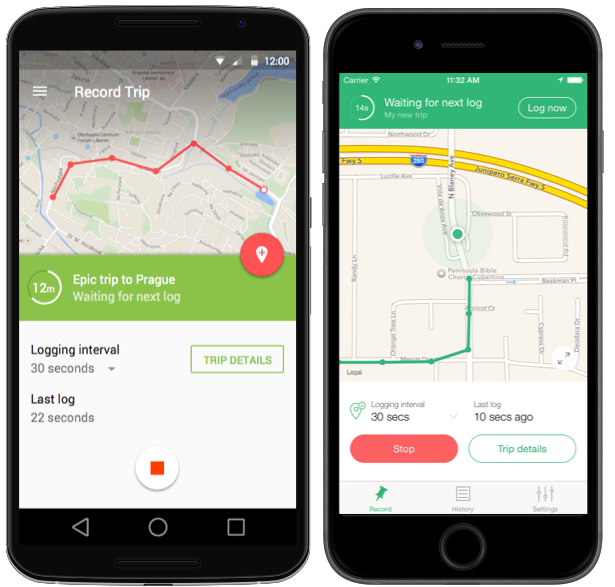
The Logging interval option lets you adjust how often the app should record your position, which enables you to balance battery life and logging accuracy.
You can manually record your position by pressing „Log now“ button. This is great when you want to override the default logging settings and record a certain location. You can also record your trips manually only by pressing the Log now button while having the Logging interval set to Manual.
When you finish your trip, it is automatically synced with all your linked Cloud services (GeotagPhotos.net, Dropbox, iCloud, Google Drive).
Trip history
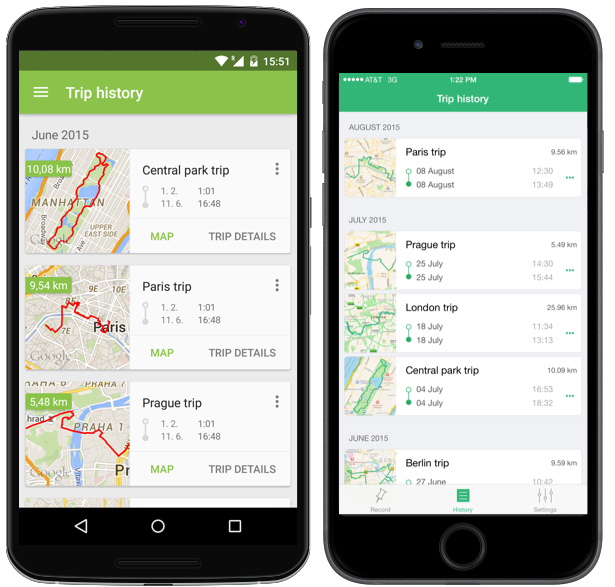
In the Trip History section you can review all of your previously recorded trips captured by your device. You can display your trip‘s map by tapping on it. You can then rename, delete, and export your trips.
You can also check details of your trips and their parts, so you have complete overview about it.
Cloud services
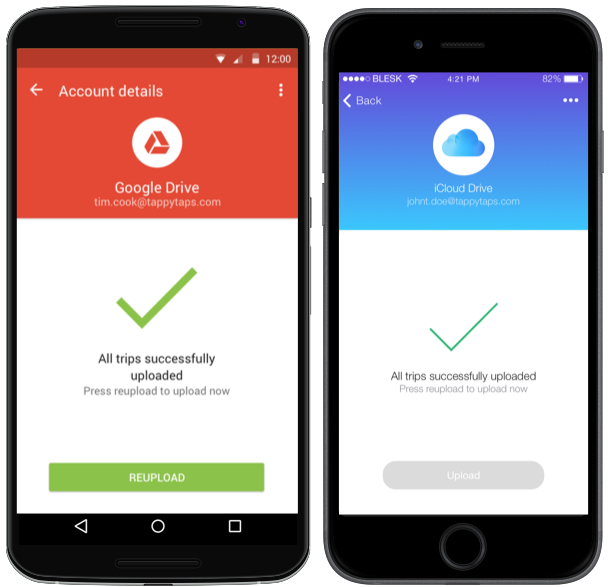
Geotag Photos Pro can upload all your trips to any of supported Cloud service. Once you’ve linked the app with any of it all your trips will be automatically uploaded to it. If you accidentally delete your trips from Cloud service, you can simply upload them again at any time.
Connecting to Geotagphotos.net
The easiest way to transfer trip data from your phone to your computer is via our GeotagPhotos.net server. To connect GeotagPhotos.net you to need to create its account.
Settings
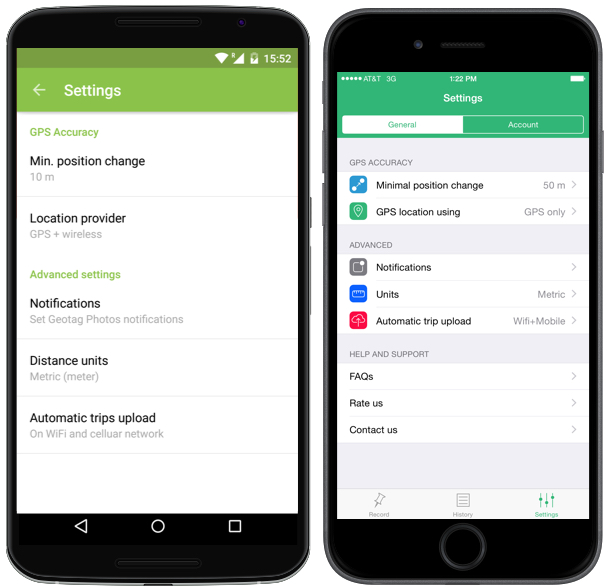
In the Settings section you can set the following:
Minimal Position Change - GPS technology can be inaccurate sometimes and, when you’re taking more pictures in a single location, this can lead to situations where each photo is tagged in a slightly different location. Min Position Change helps to eliminate this GPS interference.
Location provider - Here you can choose if you want to use any available location service (GPS + wireless) or if you want to rather save more battery and lose precision (Low Power Consumption).
Distance units - you can choose between Metric and imperial units based on your preference.
Automatic trips upload - syncing your trips requires to be connected to the internet. Here you can choose if you want to upload your trips on Wifi only or if you don‘t mind to use cellular data. You also have option to disable automatic upload.
Notification - Here you can disable/enable what notifications should appear on your phone. You can set notifications for Lost GPS signal and for Change of the timezone.
Using Geotag with smart wearables
Geotag Photos supports wide range of smart wearables, which can help you with whole geotagging process. From all supported wearables, you can start/stop recording, check, how many points did Geotag Photos recorded, you can manually log your position and change logging interval. Some wearable also supports some of other features as showing trip statistics or displaying map.
Using Geotag Photos on Apple Watch
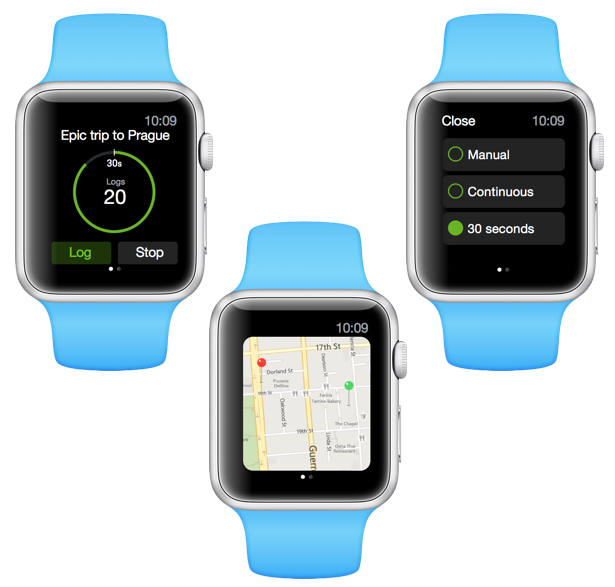
Apple Watch now supports all the above mentioned features. You can simply start or stop recording of your trip, change logging interval, display trip map or its statistics. If you are using Apple Watch, Geotag Photos will be automatically installed to your Watch.
Using Geotag Photos on Android Wear
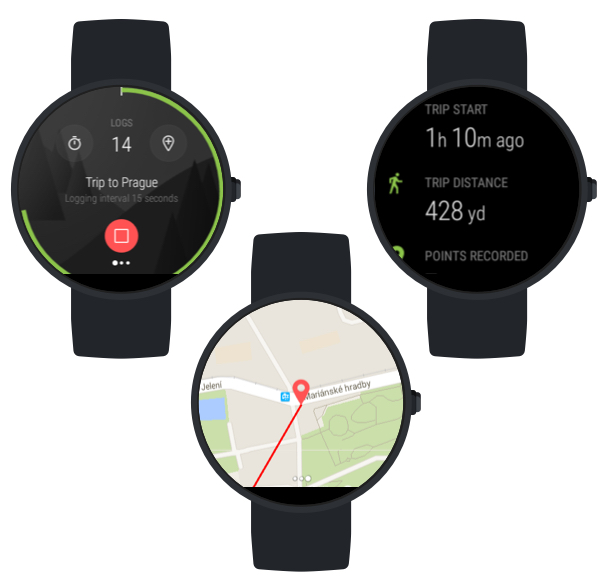
Android Wear supports all the mentioned features as well. You can simply start or stop recording of your trip, change logging interval, display trip map or its statistics. If you are using Android Wear, Geotag Photos will be automatically installed to your smart wearable.
Using Geotag Photos on Pebble Watches

Pebble and Pebble Time watches are supporting only the basic features of Geotag Photos and you can use them to log start or stop recording, change logging interval and log your current position.
Note: Pebble app must be installed through oficial Pebble App Store, but you will be notified about this fact once you link them with your phone.
Features of Geotag Photos Pro Desktop app
Continue reading, if you have these questions:
- What is the Geotag Photos desktop app good for?
- Where can I get i and on which system it works?
- Does it support my camera RAW format?
- How can I use the desktop app?
- I have a problem with no images found message?
- I have a problem with no data on server message?
Overview
The Geotag Photos Pro desktop app reads the location from your trips and adds it to the corresponding images. It automatically recognizes which photos belong to each trip so you can geotag thousands of images with just one click.
To tag your photos, you can either log in to GeotagPhotos.net and the app will automatically download the necessary data to geotag your images from the server; or you can load the required GPX file manually (this is easy to do, click here to learn how to get the GPX file).
Download and supported systems
The Geotag Photos Pro desktop app runs on Windows, Mac and Linux, and is available free from getoagphotos.net.
Supported image formats
Geotag Photos Pro supports the following file formats: jpg, nef, cr2, crw, dcr, ciff, erf, orf, k25, kdc, mef, mrw, nrw, pef, raf, tif, tiff, raw, arw, rw2, srf, sr2, srw, x3f, dng.
Features
Home Screen
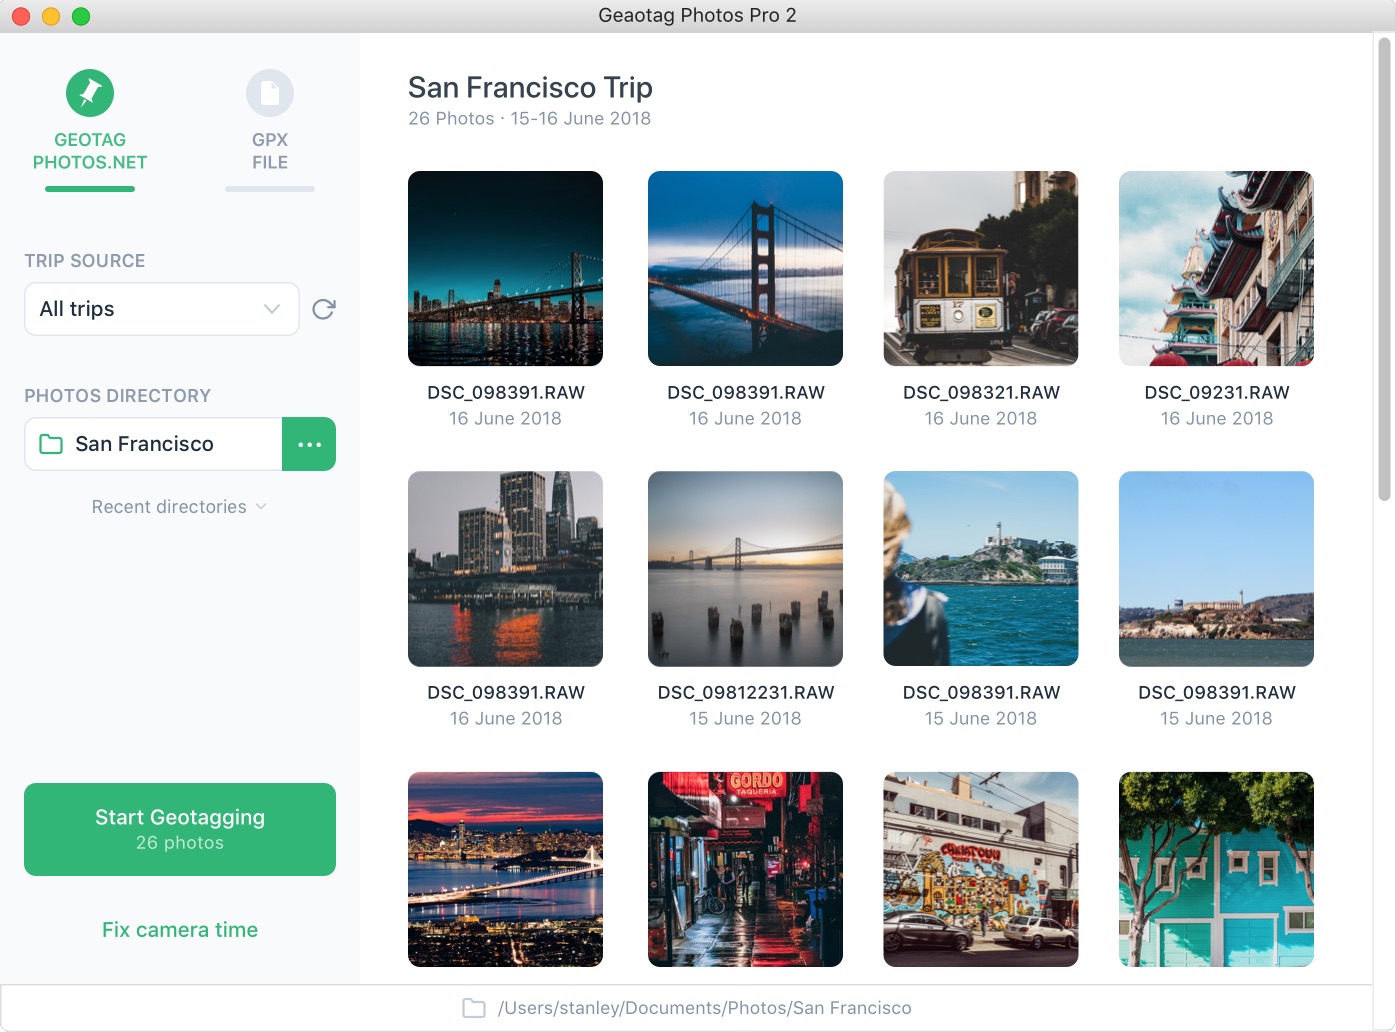
The desktop app is straightforward to use.
Log in with your Geotag Photos Pro 2 user account and open the ROOT folder containing the photos from your trip (if you open a sub-folder, you will only see the portion of the images in that particular folder).
The app automatically recognizes which photos belong to which trips (as stored under your account). AFTER geotagging is finished, simply import these photos to your favorite photo editor, such as Photos or Picasa.
Settings
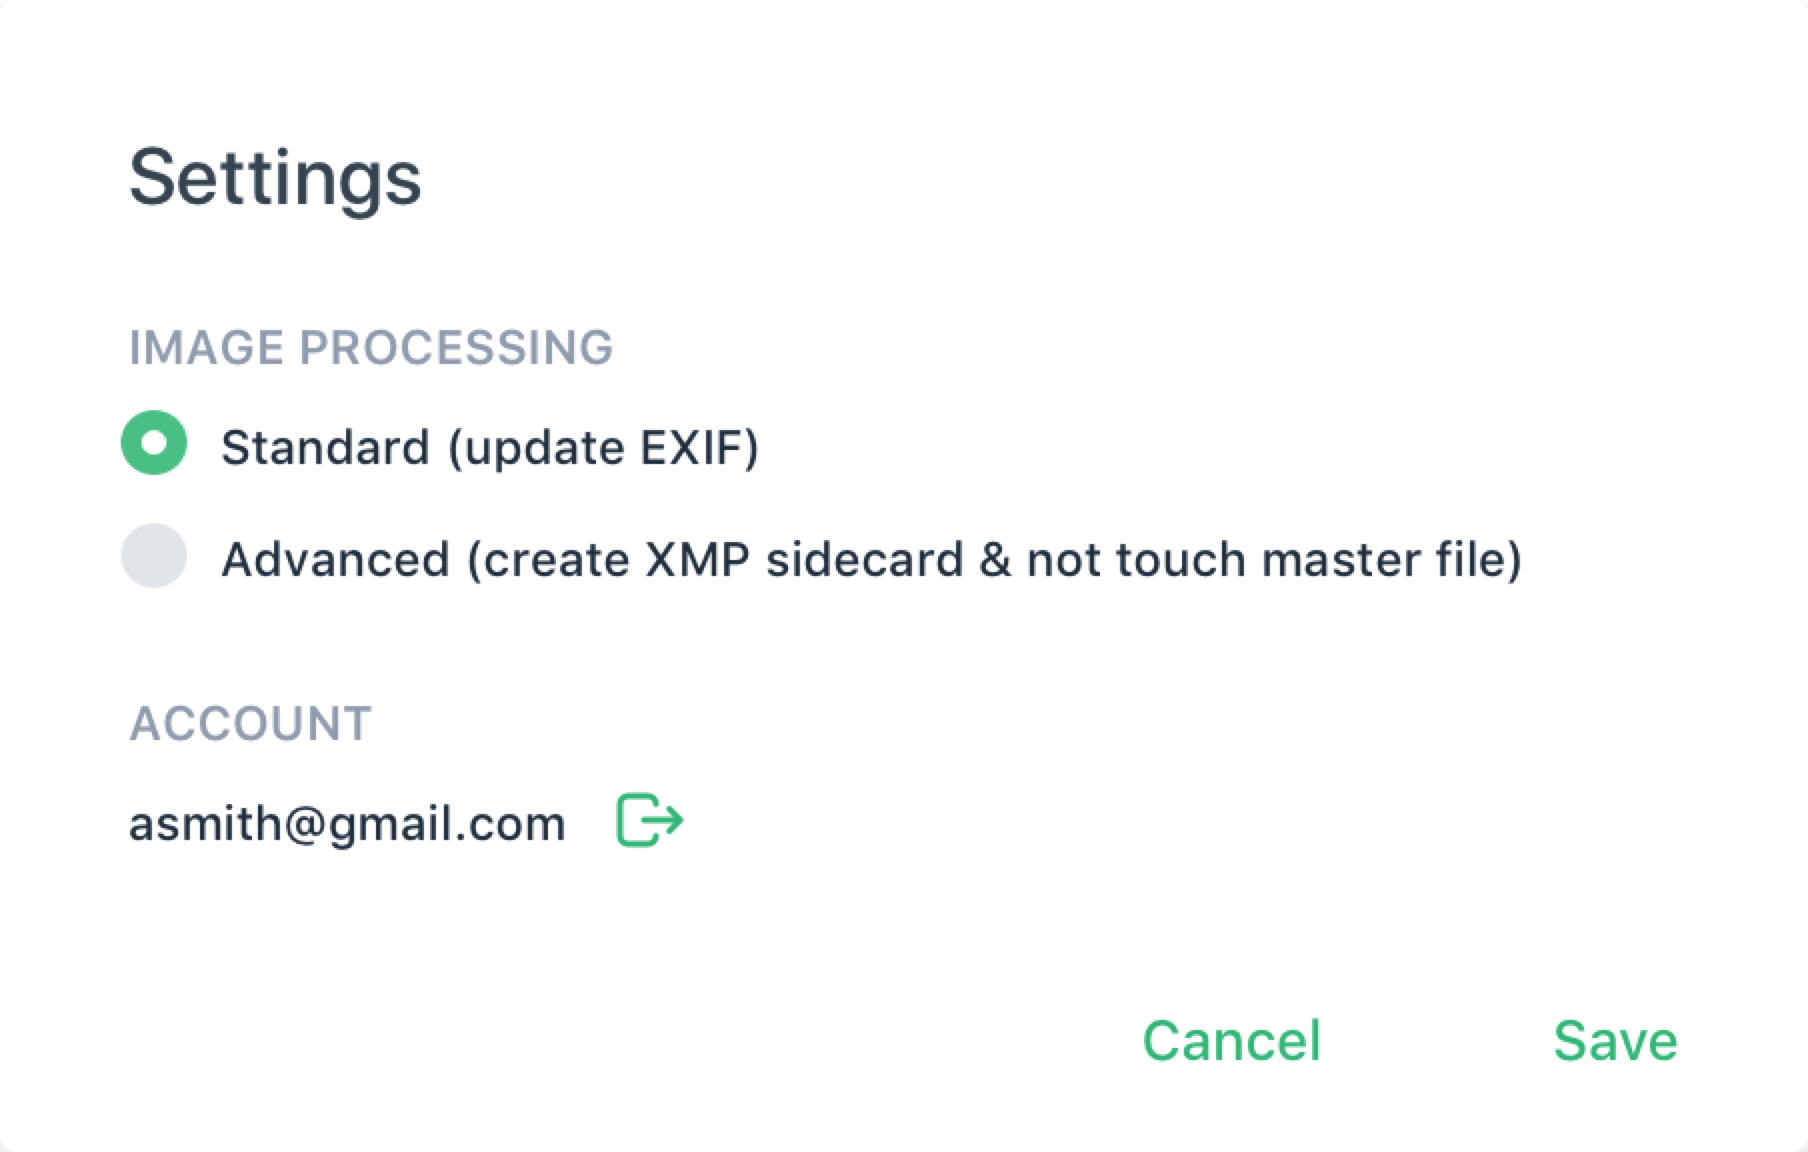
By default, the latitude, longitude, and altitude are written directly into the meta data of each photo. If you do not want to edit the original photos, you can tell Geotag Photos Pro to create separate xmp files with location data, and the original photos are not modified.
Note: not all photo editing apps are able to import xmp files, so please check the capability of the application you use.Fix Camera Time
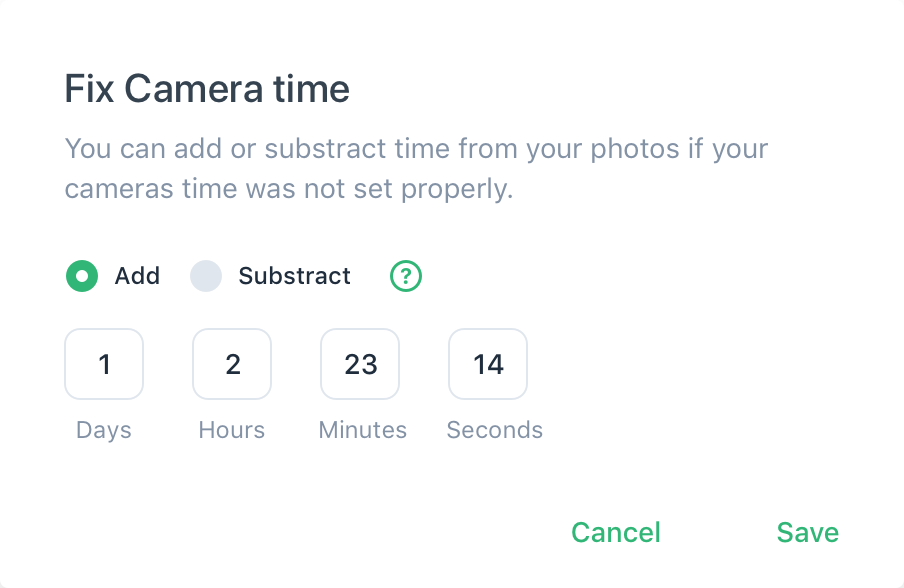
If your camera time is different to the time on your phone, you can still geotag your images. All you need to do is enter the time difference in the Camera Time Settings dialog and this will resolve the problem (bottom left of the app screen). If necessary, you can use the time zone calculator to count the time difference (http://www.timeanddate.com/date/timeduration.html).
Troubleshooting
There aren't many things that can go wrong with the app, but if you receive either of the following messages, here's what to do:
"No photos matching your trips found."
This occurs when the time date or time zone setting in camera is not synced with your phone.
To resolve it, enter you're the time on your camera into the dialog that pops up, and Geotag Photos Pro will calculate the time difference and then geotag your images.
If you do know the exact time difference, just enter it into the Camera Time Settings dialog located on the bottom right of the Geotag Photos Pro screen.
"There is no data available in the server."
This happens when your trip is not uploaded to the server correctly. To fix it, open the Geotag Photos Pro on your phone, go to Settings > geotagphotos.net, then select "Upload old data"